Repairing and Customizing Our Creeper August 11 2016
Our creeper had served us for several years before suffering a major crack as a result of plopping down on it one too many times. We prefer repair over replacement with most things, and this was no exception. While we were at it, we decided to throw in some upgrades to make it more durable and to make it ours.

Our creeper has helped us with so many installations, but it has seen better days.

Unfortunately, the backing board is medium density fiberboard, and it split after a few years of service.

We begin by separating the "mattress" from the frame and wonder if 'mattress" is the proper nomenclature for the part we are removing.
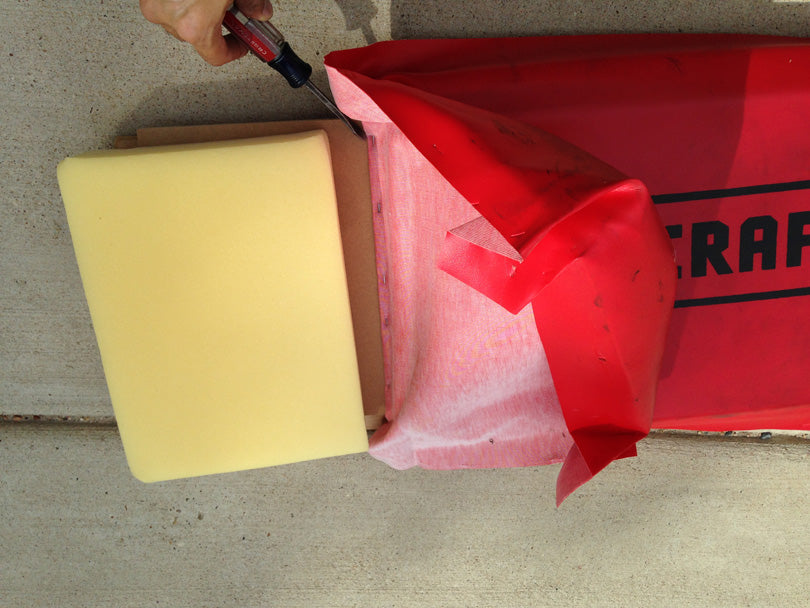
We then removed the upholstery from the mattress by prying up the staples holding it in. A combination of a flat head screwdriver and some needle nose pliers works well. Pay attention to how the fabric is folded, as you will need to duplicate this later. Taking photos helps.

Once the upholstery is off, the 1/4"-20 threaded insert is revealed. We elected to reuse these fasteners.

Threading a bolt into the insert, supporting it on the other side, and tapping it out with a mallet gets the old insert out easily.

We decided to upgrade our backing board from medium density fiberboard to 3/4" Oak plywood. We just had some of this high-quality plywood lying around and cut it to size. We then transferred the inserts over by drilling holes and then driving the insert in with a mallet. We undersized the holes by about 0.030 inch to provide a tight fit.

We chose to reupholster with a faux leather in black. This vinyl is thicker and has more texture to more closely resemble real leather. However, real leather is too nice for something that will get so dirty. We marked an outline with orange masking tape to help guide the placement of our stencil in the next step.

We used a vinyl cut decal as a mask. Rustoleum makes a paint specially designed for vinyl upholstery. The can says it adheres to vinyl and remains flexible after drying. For spraying red onto black, it helps to lay down white first. We did not, and it took about 3/4 a can in light coats to achieve the desired results.

Here is the upholstery with our logo painted and dried. We used a staple gun to staple the upholstery onto the backing board.

We then flipped it over and stapled the back, being careful to create just the right amount of tautness. No one wants a saggy mattress.

The back of the creeper was originally covered with what looked like black poster board. We opted to make a sheet metal panel, powder coat it and then attach it with some sheet metal screws. We used a utility knife to cut tiny circles in the vinyl where the fasteners go through. We didn't want to risk a screw grabbing, twisting and possibly tearing our vinyl. The thicker backing board also meant longer screws were needed to attach the mattress to the frame.

This is the final result, and we are pleased with it. It is more durable, has a better tactile feel to it and should serve us for many more years. If your creeper is worn or broken, don't be afraid to tackle this project. You can even one-up us with upgrades like real leather, memory foam, better wheels, quilted upholstery, storage, and more.
Related Articles:

Adding War Paint to a Welding Helmet
