Project E36 M3 - Removing and Replacing the Side Sill Panel November 17 2017
Our side sill panel had been cracked from years of accidentally brushing up against them while getting in and out of the car. We couldn't find anything about removing and replacing these in our Robert Bentley shop manual, nor was there much information online. Nevertheless, we ordered the new parts, and got to work.

But first, let's clarify which panel we are talking about. We are talking about the piece of plastic trim that runs along the inside of the car just at the door opening. Some parts catalogs call it a sill strip. There are various part numbers for this, depending on the body type and color. Here are the part numbers for the coupes and convertibles:
51478151391, 51478151392, 51478187167, 51478187168, 51478187169, 51478187170
The sedans, wagons and compacts use a different part number, and the clips are different part numbers too. We do not know how similar or dissimilar the side sill panel removal is for sedans, wagons and compacts.
We should also clarify that we are not talking about the door sill cover that has the M3 logo on it.
The removal process is typically destructive, and you will need new side sill panels and clips to replace the ones that are coming out. Lastly, we should mention that If you are removing the side sill panel, it will greatly ease the removal of the side kick panel that covers the front footwell speakers. It also makes the installation of our no-drill aluminum dead pedal that much easier. Now would be a good time to consider any speaker or dead pedal upgrades.

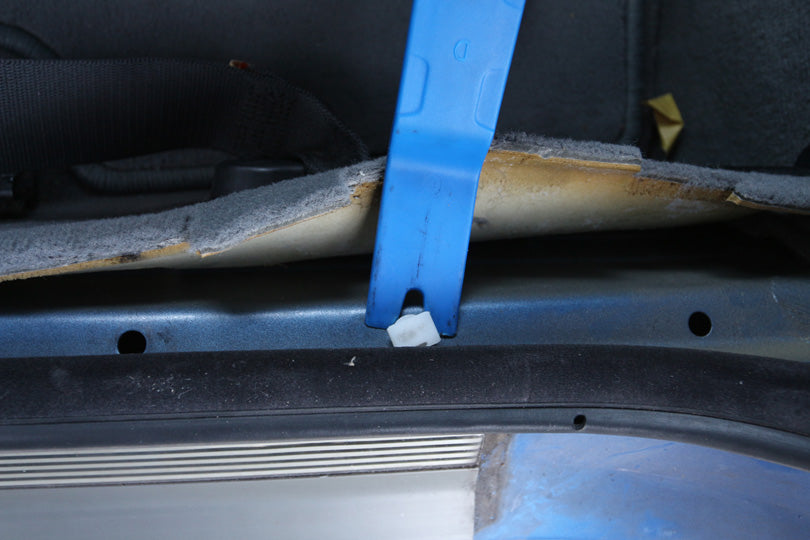
The side sill panel comes up with some prying. We used some nylon pry tools here to safely lift the sill up without scratching the paint. We don't recommend using a screwdriver, as this will scratch up the paint on your chassis. We worked from the front to the rear. The white nylon clip will stay in the chassis, and the slots in the side sill panel that hold the white nylon clips will lose their grip on the clip. This is a destructive removal process and will probably result in the side sill panel not being able to be reinstalled without new clips.
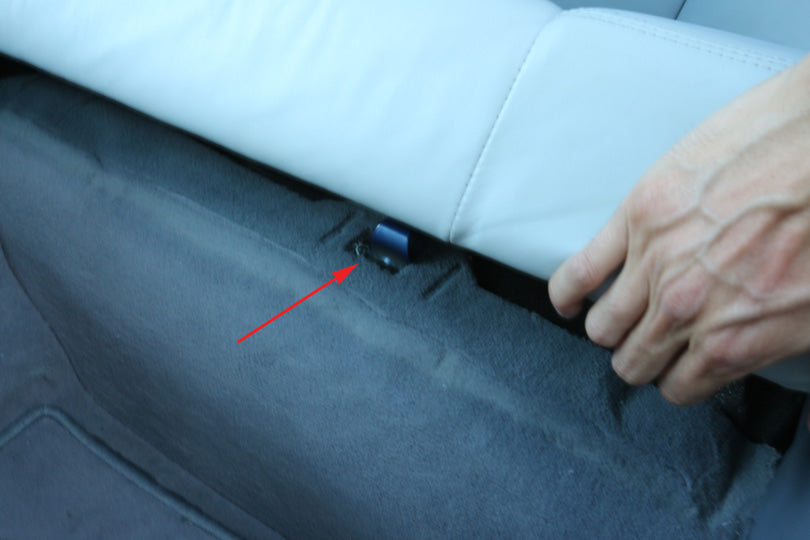
Once the side sill panel is freed from all the clips, we have to free it from the carpet at the rear. To do this, lift up on the rear seat, unhook the carpet from the bracket and move the carpet out of the way.

Once the carpet is out of the way, you can wrestle the side sill panel out. Also note the mushroom-shaped clip at the rear. You will have to lift the side sill panel up and off of the mushroom.

Above is a view of the back side of the side sill panel. The circular slot fits over the mushroom.
Now we have to pop out all the white nylon clips from the chassis. I won't kid you and say that these come out easily. I used a nylon pry tool to get about half of them out. The key is to get under the clip, which can be difficult. Using pliers or vise grips to try to pull them out, typically results in chunks of the top of the clip coming off. I tried vise grips once, and it broke off the top half of the clip. With nothing left to grab onto or pry up on, I had to give it a tap and send it downwards into the chassis. This is obviously not ideal, but sometimes it's your only option.

For some of the clips that were more stubborn, I carefully drilled out the center of the clip to weaken it and allow it to be squeezed out of the hole more easily. I also used a double pry tool technique shown above.

Once all the clips are removed, we can install our new parts. Slide new clips into the slots on the side sill panel. Then reinstall the side sill panel starting at the rear. Hook the panel on to the mushroom-shaped clip and then fold the carpet into the panel.
Next, make sure that everything is where it needs to be before you pop the clips back in. Once the clips pop in, it is not very easy to undo without starting this whole process again with new parts. Is the rubber weatherstripping where it needs to be? Is the kick panel in place? If everything looks good, line up all the clips with the corresponding holes in the chassis. Then, give the panel a whack downwards with the palm of your hand or a rubber mallet at each clip and it should pop into place.
Close the door gently the first time to verify that isn't catching on the door. If everything looks good, you're done! Enjoy your new side sill panel that is not cracked or scratched.
Related Articles:

Project E36 M3 - Removing Kick Panels
